We have provided a Virtual Machine for OroCRM in the latest pre-installed version. This post will simplify setup for those that would like to access OroCRM locally. You can download the Virtual Machine OVA image here.
Tutorial Video on Setting-Up the Virtual Machine
Deployment and Use
Coming pre-installed with the latest OroCRM version, we provide a VirtualBox Virtual Machine OVA image. This Virtual Machine is based on the SliTaz Linux system and requires relatively few resources. If you have not downloaded the most recent version of OroCRM, you can also download the virtual machine directly from the downloads page. Once that is downloaded, you can begin to import an alliance in the .ova format.
To import an appliance in .ova format, simply double-click on the OVA file. Alternatively, select “File” -> “Import appliance” from the Oracle VM VirtualBox Manager window. In the file dialog that comes up, navigate to the file with .ova file extension.
If VirtualBox can handle the file, a dialog similar to the following will appear:
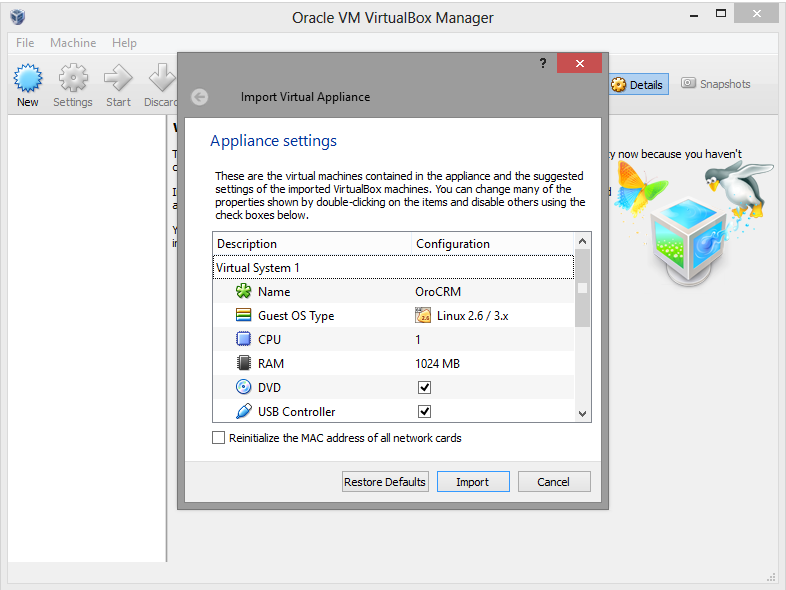
This presents the virtual machines described in the OVA file and allows you to change the virtual machine settings by double-clicking on the description items. Once you click on “Import”, VirtualBox will copy the disk images and create local virtual machines with the settings described in the dialog. These will then show up in the Manager’s list of virtual machines.
Now you can start the imported Virtual Machine. When the virtual machine is started, the user will then be prompted to log in.

Regular user credential:
username: oro
password:
Administrator credential:
username: root
password: root
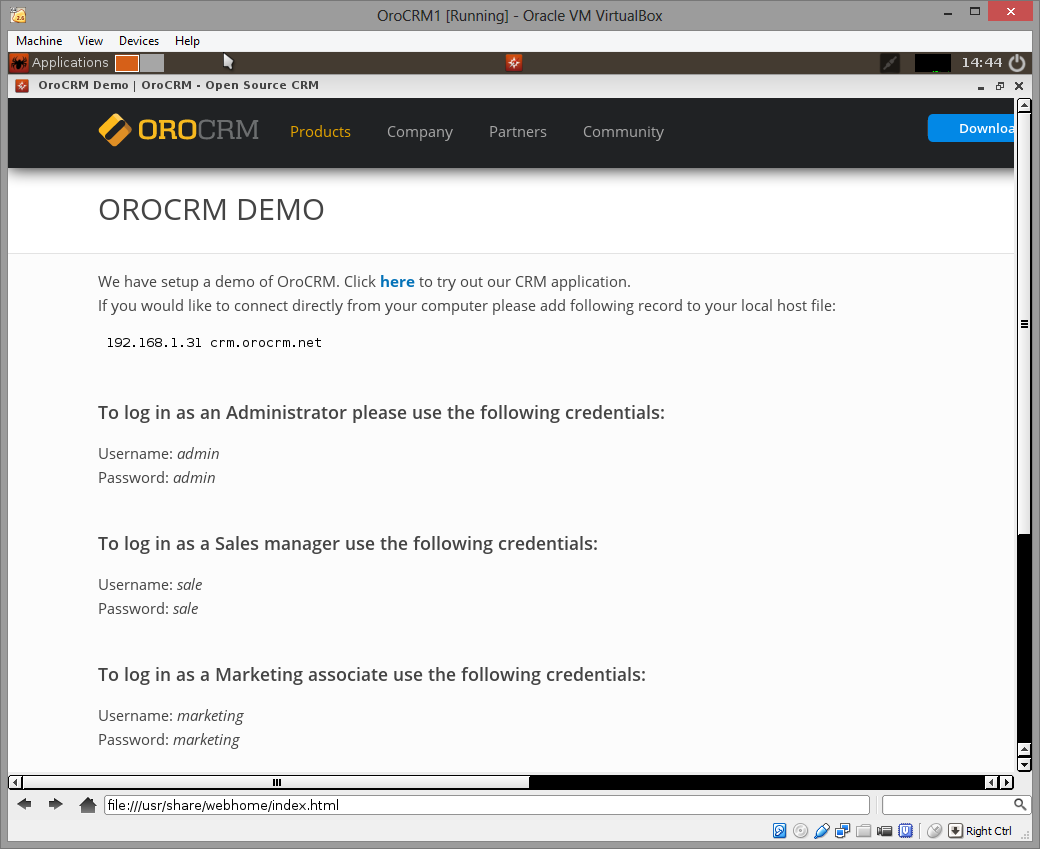
To start with OroCRM simply press “Enter” twice. The initial page will then be opened and OroCRM will be available under the “Click here” link. If you would like to connect OroCRM outside of Virtual Machine, update your local host file with provided data from the initial page.
Update system HOST file
Windows systems
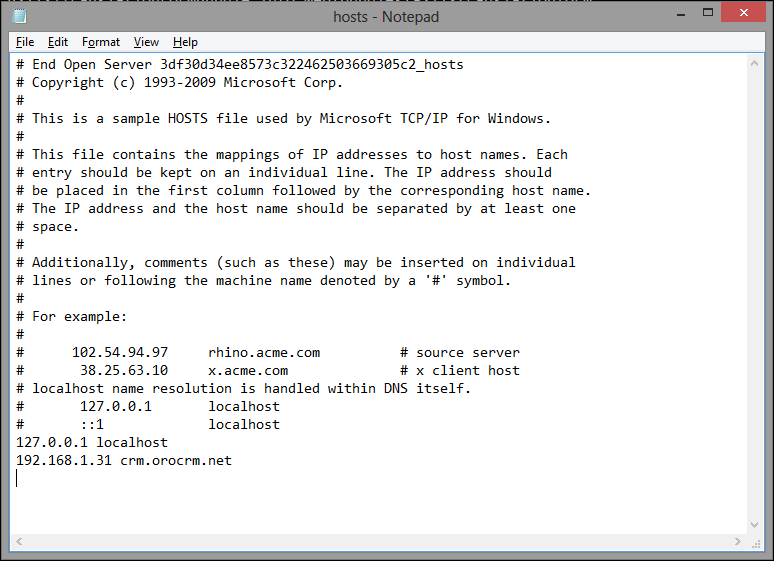
To access the hosts file in Windows systems, you can use the following command in the Run Line to open notepad and the file. Be sure that you have administrators privileges.
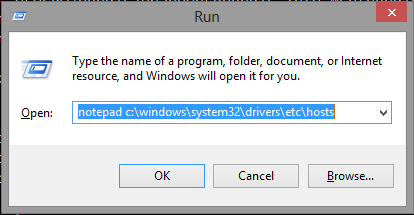
Here you can edit file. In this example, crm.orocrm.net domain will point to 129.168.1.31 as the Virtual Machine IP address.
Linux systems
In most Linux systems and MacOS you can edit the hosts file directly in the terminal
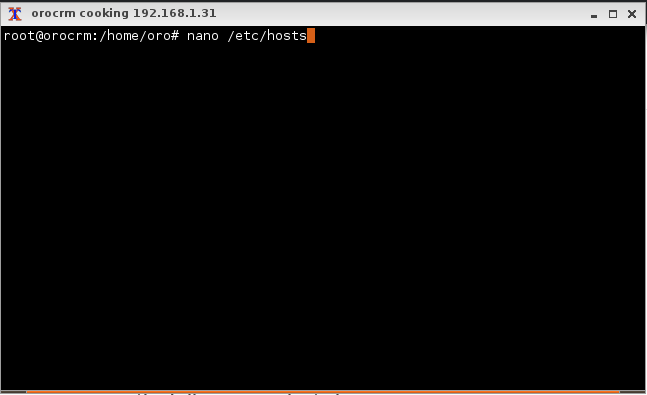
You can use your favorite editor like nano, vi, vim etc.
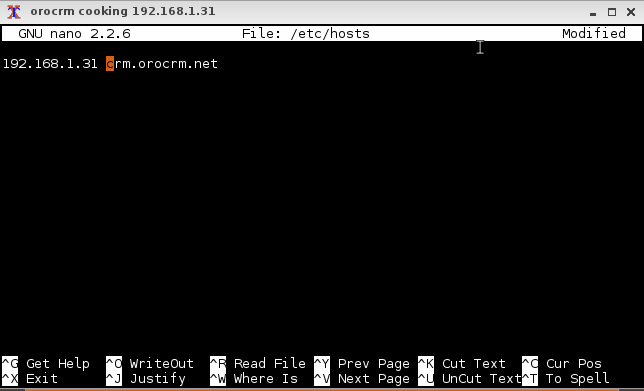
Now we can save the file and return to the local OroCRM.