Welcome to OroCRM video tutorial series. This is Alex with OroCRM and in this video, I will demonstrate how to create a Marketing List.
A Marketing list is a list of contacts segmented according to conditions which are defined for the purpose of bulk emailing or telephone outreach.
Marketings lists can be used:
- To run Email Campaigns in OroCRM
- To synchronize with Subscribers Lists in MailChimp and/or Address Books in DotMailer.
In our example I will create a marketing list of customers who have a lifetime sales value greater than $1,000.
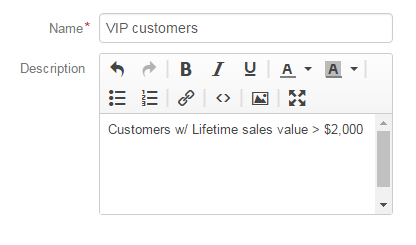
To create a marketing list navigate to Marketing → Marketing Lists click the Create Marketing List button in the top right corner of the page. The create Marketing list form is now displayed. Define the name of a list as it will be referred to it within OroCRM.
The description field is optional. It can be filled with text to help you and other users to understand the purpose and logic of this list in the future.
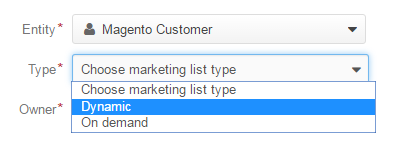
Select an entity from the drop-down list which we are going to select our contacts from. Only entities that have contact details (E-mail or phone number) are available as columns. Select a type of a list from drop-down menu. Dynamic lists are updated frequently as changes take place in the system. On demand lists will be updated only if a user requests to refresh the grid in the View page of the Marketing List.
The owner field defines the user who can manage the marketing list. By default the Owner is the currently signed in User. This can be changed by using the select menu, or by typing User’s name.
In the “Columns” section I will define the set of fields that will be included in our marketing list.
You will notice a blue note saying that the list requires at least one column with contact information and which contact information fields are available for this entity.
In our example we will create a simple list with a first, last name and email.
Select the field “First name” from the drop-down menu in the “Column” section.
Label is the name of the field on the grid. The value defined for the field is added by default, but can be easily modified.
It is possible to define the sorting order if you want the grid to be sorted by the field value.
Finally, click the “Add” button.
I will repeat the procedure for the remaining fields.
The position of the column can be easily changed by dragging a column in necessary order.
Hover cursor on the “Move column” icon in the Action bar and reorder as needed.
You can easily delete or edit a column settings by pressing Delete or Edit icons.
Once the set of columns for the marketing list is defined we need to define conditions that will be used to segment the list. This is done in a Filter section.
In our example we will apply a “Field Condition” filter. To learn about the functionality of other filters available please refer to a video tutorial “How to create a report”.
The Field Condition filter sets a condition for selecting records with specific values. Only records that meet such condition will be included in the segment.
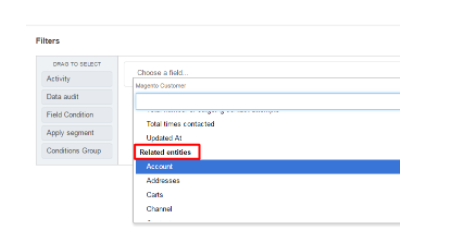
To define a field condition drag “Field condition” to the box on the right and click “Choose a field…”
A drop-down list will appear. At the top of the drop-down list, you can see a breadcrumb for your current location in the entity structure.
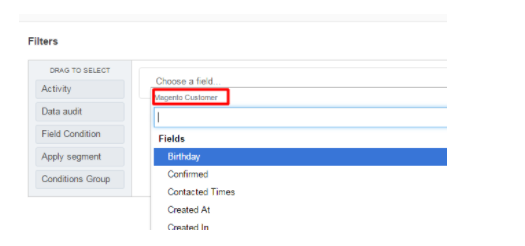
The list contains the fields available for the chosen entity, as well for the related entities.
Choose the field that you want to use. In our case I will select Lifetime sale value.
By clicking on Equal icon near the field value, a list of operators will be displayed.
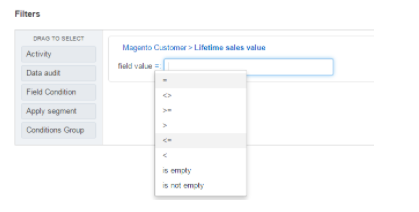
I chose value greater or equals $1,000.
Once all fields and conditions are set, Save the list with the Save and Close button in the top right corner of the page.
The marketing list with columns and records matching a condition set will be displayed.
This Marketing list is now available on Marketing lists grid and ready to be used for mass mailing.
Thank you for watching!
For more Tutorial videos please visit our CRM training center.